Pea is an unpretentious plant, whose modest demands allow you to get a crop not only from the garden, but also at home. Following simple instructions, you can get fresh sweet peas to the table all year round.

Suitable places for growing peas at home
First of all, you need to decide on a place to grow. Here you need to consider one of the basic requirements - good lighting. You can choose one of three options:
- Glazed balcony. An insulated loggia or balcony is an ideal place, as usually there is enough space and light, and the ground does not freeze. In such conditions, peas can be grown all year round.
- Open balcony. This place is suitable only before the onset of stable frosts. Although peas are a cold-resistant plant, the soil in the pot freezes faster than in the garden. If this happens, the seeds or young seedlings will die.
- Windowsill. If the apartment does not have a balcony or loggia, peas can be grown on a fairly wide window sill.
It is best to grow peas on a window or balcony facing the south, southwest or southeast side. If there is no such side in the apartment, you can increase the daylight hours for the plant using a fluorescent, LED or special phytolamp. It needs to be hung about 50 cm above the container with plants.
Peas are not afraid of fresh air, so you can safely open the windows. Such hardening will benefit the plant.
Peas grows high enough, can close the window completely and the room will be dark. Therefore, do not put it on a single window in the room.
Optimal varieties of peas for growing at home
Some peas are better suited for growing in an apartment. Dwarf bushes are especially noteworthy - they do not take up much space compared to ordinary bushes, whose growth can be a meter or more.
- Adagum. Mid-season semi-dwarf variety up to 75 cm high.

- Altai Emerald. Dwarf variety, reaches a height of half a meter. The pods are small and even, the fruits contain a lot of proteins and sugars.

- Vera. A semi-dwarf variety up to 65 cm high, white. The fruits are wrinkled, yellow-green in color.

- Emerald. Mid-season variety, reaches a height of 85 cm. Known for high productivity: in a pod of 10-12 beans, on a bush up to 10 pods.

- Premium. Early ripe variety up to 80 cm high. Fruits appear after 2 months. There are 14 pods on a bush, each usually with 9 peas.

- Early 301. Early ripe variety up to 40 cm high. Ripens in about 50-55 days. Great for conservation.

- Ambrosia. Sugar variety, reaches a height of up to 70 cm. Ripens in 55-56 days.

- Oregon Sugar Pod. The variety is resistant to cold and many diseases, grows up to 70 cm.

- Early mushroom-11. Early ripening variety, ripens in an average of 64 days. Half-dwarf, from 40 to 70 cm high. The fruits are large and delicate in taste.


Choosing a variety, you can consult with those who have already received the crop, growing peas in the apartment. The best option may vary by region.
How to grow peas at home?
To get a crop of peas at home, you need to follow a number of mandatory requirements for growing a crop.
Optimal conditions
Peas need enough light and space. When choosing a place, it should be taken into account that the optimum temperature for the plant is 18-24 degrees, although seeds can germinate at 3 degrees, and young plants can withstand short-term frosts of -5 degrees.
If there are pets at home, you need to protect seedlings from them.
You should take care of the supports in advance: you need to install vertical sticks by pulling a net or ropes on them, for which the plants will cling as they grow. This will provide them with more sunlight and a richer crop.
Another important condition is humidity. It can be provided not only with regular watering. For example, you can install nearby a room fountain, an open container with water, or other moisture-loving plants. You can put wet pebbles or expanded clay in a pan with pea shoots. When it rains, it would be nice to open a window or balcony.
Before you start growing peas at home, you should think about how much the owners are ready for high humidity in the apartment.
Soil preparation
Land can be dialed from the garden. It is advisable to take the soil on which pumpkin or solanaceous had grown before, but not from the area where the beans grew.
The taken soil should be sterilized. In winter, it is enough to simply put it overnight on an unheated balcony. At other times of the year, you can put the earth in the freezer, roast it in the oven or steamer. This treatment will protect against the larvae of harmful insects that could accidentally end up in the soil.
The sterilized soil should be mixed with loosening components (sawdust, finely chopped straw, pebbles or rotted humus) in the proportions of 1: 3.
Soil can not be mixed with fresh manure: peas will go to the tops and will not bring a crop.
Then phosphorus-potassium fertilizers should be dissolved in water, left to infuse for a day, and then fertilized with this solution the earth. After that, you need to thoroughly loosen it.
Peas are not picky about the soil, but they bring more crops on light alkaline soil. You can check the alkalinity of the soil using vinegar: take a little soil into a spoon and drop vinegar on it. If light foam appears, then alkalinity is sufficient.
Seed preparation
First you need to check the planting material for germination: pour a liter of warm water in a jar, dissolve 20 g of salt in it and pour seeds there. If some seeds come up, it means that they are empty inside, without a germ. Such peas are unsuitable for growing.
After such a test, the seeds should be washed in running water and laid out on a napkin. The next step in the preparation of seed is disease prevention. There are two ways to do this:
- soak the seeds in a bright manganese solution for 6-8 hours;
- immerse them in a solution of boric acid (0.2 g per 1 liter) for 10-15 minutes.
Then peas should be washed again and kept for 6 hours in clean water, heated to 45 degrees.
After the seeds are checked and pass the prophylaxis, you can choose the method of cultivation. You can sow dry seeds, which will gradually draw moisture from the ground and germinate. If you plant sprouted seeds, seedlings will appear about a week earlier.
To extend the harvest period, peas can be planted in 2 runs with a difference of 2 weeks.
Germinating seeds is easy. To do this, you need:
- Take a plate and a piece of cotton or linen.
- Wrap the seeds in a damp cloth and put in a plate, you can cover with a bag on top. Place the plate in a dark and warm place.
- Once a day, the seeds need to be washed and constantly make sure that the fabric is moist: if it dries, the seeds will die, and if not washed and kept exclusively in the stuffiness and dampness, they will rot.
- After 5-7 days, sprouts will appear with a length of about 3 times the diameter of the grain. This means that seeds can be planted.
Do not use cheesecloth for germination - sprouts break between the threads and pulling them out without damaging them is almost impossible. Paper napkins are also not suitable, as they retain moisture poorly and quickly become unusable.

Immediately before planting, the seeds must be treated with nitragin and fertilizers containing molybdenum and boron. This will accelerate the development of sprouts.
Selection of containers for growing
Before picking, sprouts can be grown in envelopes from a newspaper or a common tray. Then they will need to be transplanted into pots or a box made of wood or plastic. Ceramics are ideal, which provides the necessary air exchange and does not allow excess moisture to linger.
For the normal development of the pea root system, the depth of the box should be from 35 cm and deeper, because in nature the roots of this culture go deep into the distance, equal to the height of the plant.
It is important that there are holes at the bottom for the outflow of excess water - it should not stagnate, otherwise the roots will lack oxygen and the plant may wither. At the bottom, it is better to pour a little drainage: 2 cm of small pebbles or expanded clay. Then sterilized soil is poured on top, 3-4 cm should be left to the edge.
Planting seeds
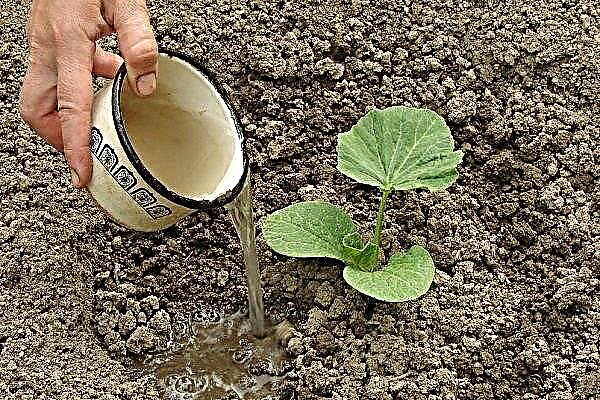
It is better to plant seeds in rows, leaving between them 2-3 cm and 2 cm between peas. The depth of embedding is 2-3 cm. During planting, the earth must be abundantly watered so that it becomes viscous.
Immediately after planting and watering, the container should be covered with film to make a small greenhouse - this is especially true if the balcony is cool. Every day you need to remove the film for 10-15 minutes and water as the earth dries.
It is not worth allocating a large area to each seed at once: the soil will turn sour and rot will appear. You can plant seeds in peat pots or disposable cups, but subsequent transplantation into a larger container will still be needed.
Seedling care
When the shoots break out of the ground, the film needs to be removed. Plants should not be exposed to the sun immediately, they should stand in the shade for a couple of days. After about a week, the first top dressing is introduced - a solution of superphosphate.
When 2 leaves of the plant are formed, you need to plant the sprouts in separate pots or more spaciously distribute in a tray. Plants need to be planted in rows, this time leaving between the sprouts 5-10 cm, and between the rows - 10-15 cm. It is better to dive the sprout with a lump of earth into which the roots of the seedling sprouted.
The plant is planted to a depth of 5 cm and sprinkled with earth. It is necessary to water the soil by finely spraying water with a special nozzle or strainer. In the same period, complex fertilizers containing potassium, copper and phosphorus are added.
Watering, loosening, top dressing
You need to water the plants regularly. Usually, a signal of a lack of water is a dried up topsoil, which, when rubbed between fingers, appears prickly, it is impossible to collect such soil into a ball.
Before flowering, water the earth 2 times a week. After watering the aisle, you need to loosen it to a depth of 3-4 cm: this will help retain moisture and provide access to oxygen to the roots. Growing plants should be spud.
After about a month, the plants begin to bloom. During this period, top dressing stops, and watering is required more often, since peas need more moisture to form fruits than for their own growth. If there are suspicions regarding the sterility of the soil, during this period you can treat the plants with garlic solution, and add ash to the ground - this will serve as a preventive measure.
Peas are pollinated independently, so problems with fruit setting usually do not arise. If the plant obviously blooms poorly, you can occasionally shake the stems.

Disease control
Peas grown at home rarely get sick, but some diseases are not excluded.
Powdery mildew
One of the most dangerous diseases of culture. First, a white or light gray coating appears on the leaves, which gradually darkens and hardens, and the leaves under it dry and curl.
The use of chemicals is not recommended, because they remain in the soil and penetrate the fruits. As a preventative measure, you can add a little potassium permanganate to the water for irrigation, and wood ash to the ground. It is also important to observe the temperature regime: make sure that there are no sudden changes, do not pour cold water.
If the disease was noticed at an early stage, you can get rid of it with the help of folk remedies:
- a mixture of sulfur and freshly slaked lime in a ratio of 1: 2;
- colloidal sulfur solution (1%);
- a mixture of whey and cold water in a ratio of 1:10;
- a mixture of ash infused in boiling water (1 liter of boiling water per half a glass of ash) and a soap solution (4 grams).
If this does not help, you will need to use fungicides or biofungicides: Tilt, Fundazol, Gamair and Planriz.
Root rot
The disease appears if you go too far with watering, do not loosen the soil or plant the plant immediately in a large pot. Outwardly, the disease does not appear immediately: at first the plant looks healthy, then it seems that it lacks moisture, since the root system is no longer able to fulfill its role. Then dark slippery spots appear at the base of the stem.
It will not be possible to save such a plant, it must be thrown out along with the soil as a source of infection.
Possible growing problems
In violation of the rules for growing crops, other problems may appear:
- the lashes dry out - insufficient watering, too high temperature;
- pods are not tied - excess watering, lack of light or space;
- leaves darken, dry and fall - lack of magnesium;
- curved and half empty pods - lack of potassium.
Subject to the rules for soil and seed preparation, most problems can be avoided.
Harvesting
About a month after the main flowering, the pods begin to fill with peas. Usually the first fruits should be sought in the lower part of the bush.
For fresh consumption, freezing or canning, peas are collected at the stage of milk maturity. Its beginning is evidenced by a smooth green color and peas closely adjacent to each other. No need to rip off the pod by pulling it - it can damage the rest of the plant. It is better to remove the pods by gently holding the stem with the other hand.
Timely harvesting favorably affects the fruitfulness of the plant: if you leave the formed pods on the stem, they will accumulate nutrients, and if you remove them in time, these substances will go on the formation of other pods. You need to collect the fruits after about 2-3 days, the harvest period lasts up to 2 months.
The crop includes not only fruits, but also fresh pea leaves: they are rich in useful trace elements, have a pleasant taste and juicy structure. They can be added to salads.
If you need seeds for sowing, you will need to wait for the actual maturity, when the lower pods are covered with a yellow mesh, and the peas harden. The plant is cut and suspended with the top down until the fruits completely dry - preferably in a well-ventilated area.
Growing peas in an apartment is a simple but exciting process. If you adhere to the recommendations proposed in the article on planting and caring for the crop, you can guaranteed to wait for a good harvest.