Tomato Juggler is an early ripening hybrid variety, which was bred by Russian breeders for cultivation in the Siberian and Far Eastern districts. The plant calmly tolerates a slight drop in temperature and drought, and can bear fruit both in open ground and in film shelters. Tomatoes weighing more than 250 g have excellent taste and universal purpose.

Juggler tomatoes

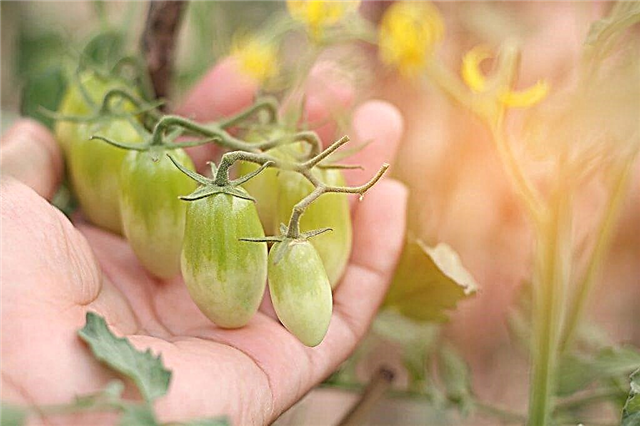
Juggler tomato seeds

Variety "Juggler" bred by Russian breeders for cultivation in the Siberian and Far Eastern districts
Description of the variety
Juggler F1 belongs to the early maturing high-yielding hybrid of the first generation, the first fruits of which can be harvested 90-95 days after the emergence of mass shoots. The variety was bred by Russian breeders and appeared in the State Register in 2008. It can be grown outdoors even in the Far East and Siberia. We will consider the main characteristics of the plant and fruits separately.
Bushes
By the type of growth, a low-leafed plant is determinant. When grown in open ground, the height of the bushes reaches 60-70 cm, and in a greenhouse - 100-110 cm. Leaves are ordinary, have a dark green color, medium dissection and weak corrugation.
The inflorescence is of the usual type. The first of them appears above 5 or 6 sheets, and the next ones - after 1-2 sheets. On one hand, about 5-8 fruits can ripen at the same time. As a rule, about 30 tomatoes are tied on one plant, and ripening is friendly.
Fruit
They have the following characteristics:
- Weight... On average, it is 250 g, but when grown outdoors it can reach 300 g, and in a greenhouse - 400 g.
- The form... Tomatoes with a dense skin have a rounded flat shape with a slight ribbing at the stalk.
- Colour... As the fruit ripens, it turns from green to deep red, without spots.
- Pulp... Moderately dense, fleshy and juicy pulp with 4-5 seed chambers, solids content up to 4% and sugars up to 2.3%.
- Taste... Sweetish taste with a slight sourness, without wateriness.
Juggler hybrid tomatoes are heat-resistant, have good keeping quality and transportability.
Characteristics table
Tomato Juggler F1 is very popular among other hybrids due to its characteristics. They are shown in the following table:
Parameter | Description |
| general description | Hybrid, early maturing, determinant variety |
| Originator | Russia |
| Ripening period | 90-95 days after germination |
| Yield | Outdoors - 13-16 kg from 1 sq. m, and in the greenhouse - 22-24 kg from 1 sq. m |
| Disease resistance | High, but the plant needs preventive treatment. Not afraid of phytophthora, since it is an early maturing variety. |
| Appointment | The variety is universal. The fruits can be eaten fresh, used for conservation and processing, since they do not crack under the influence of high temperatures. Meanwhile, tomatoes are sometimes unsuitable for canning as a whole due to their large size. Can be grown for sale. |
In the following video, you can see what the Juggler bushes look like with powerful immature fruits:
Agrotechnics
To get a good Juggler crop, there are a few basic rules to keep in mind:
- It is necessary to sow seeds for seedlings not earlier than the second half of April or 55-60 days before the intended planting in a permanent place. As a rule, the seedlings are transplanted outdoors after June 10. Landing scheme - 50x30 (40) cm.
- The tomato should not be grown on clay, heavy loamy and acidic soils with a pH value below 5. A suitable option is loose and light soil saturated with humus.
- There should not be an excess of manure in the selected substrate, since it will provoke an increased growth of green mass, due to which the ovaries and future fruits will lag behind in development.
- Regardless of the method of growing tomatoes (through seedlings or direct sowing in open ground), it is undesirable to use a substrate on which other varieties of tomatoes, potatoes, peppers or peas were grown last year. The fact is that pathogens of various diseases often remain in such a land, which can be dangerous for the Juggler.
- In temperate or cold climates, the tomato should be grown through seedlings, as this will speed up the harvesting process. The fact is that while young seedlings grow and strengthen at home, the soil on the site will have time to warm up well.
- After planting, it is required to organize competent care of the seedlings, which implies their timely watering, fertilizing with mineral fertilizers, pinching, as well as preventive treatment against pests and diseases.
Compliance with all the rules of agricultural technology will allow you to get the maximum yield - up to 16-24 kg of fruits from 1 sq. m of the landing site.
Planting through seedlings
In this case, you can use one of two ways - buy ready-made seedlings or grow it yourself. Each method requires a separate consideration.
You can get helpful tips on how to grow tomato seedlings in the next article.
Purchase
With a lack of experience or unwillingness to independently cultivate seedlings, they can be purchased in proven places. In this case, you should pay attention to the following parameters:
- Green mass state... Saplings should not have too thick trunk and huge leaves. Although they look attractive, they will not give good ovaries, but the painful tops will grow throughout the area. As a rule, such seedlings are overfed with nitrogen fertilizers. Of course, the stems should also not be too long and thin, and the lower leaves should not be yellowed. Such seedlings simply cannot take root in the garden.
- Number of leaves... If the specimen is healthy and strong, then it should have at least 7 leaves. The lower ones must be intact, without yellowness or brown areas.
- Barrel size... Ideally, it should resemble a pencil, but it can be slightly thicker.
- Root system... Should not be dry or show signs of putrefactive lesions.
- Location... If the seller literally filled the boxes with seedlings, their root system is probably already damaged, so you should refrain from purchasing them. Of course, the roots can grow back, but this will take at least 1-2 weeks.
The purchase of seedlings should be approached with special attention, because even if there are several seedlings with putrefactive lesions or viral ailments, all supplies may die.

DIY preparation
You need to plant seeds for seedlings in early March. This process consists of the following steps:
- Choice of containers... Should be spacious and have drainage holes in the bottom. Boxes meet these requirements. Meanwhile, you can plant tomatoes for seedlings in separate small containers, which will avoid plant picking.
- Seed preparation... For germination of seeds, planting material must be poured with slightly salted water, removed after 30 minutes, rinsed with clean water and dried. Several seeds may float to the surface while soaking. They must be removed because they are unusable. There is another way of processing - the day before planting, place the seeds in a damp paper towel, which will ensure their quick pecking.
- Substrate preparation... It can be purchased at a garden store or prepared by hand by mixing in equal parts humus, peat, turf soil and woody leaves. A glass of wood ash should be added to the finished mixture, 3 tbsp. l. superphosphate and 1 tbsp. potassium sulfate, and then mix everything thoroughly. In any case, the substrate must be disinfected - placed in an oven and warmed up for 20 minutes at a high temperature.
- Planting seeds... The prepared soil should be filled into containers and slightly moistened with warm water. The seeds are deepened 1 cm into the ground, leaving 2 cm between them, and covered with a fertile substrate or peat, but with a layer no thicker than 1 cm.If the seedlings are grown in small containers, 2 seeds can be thrown into each of them, in order to leave only the strongest sprout.
- Placing seedlings... After planting, cover the soil with foil, and place the containers in a warm place. When the first shoots appear, the film must be removed, and the container must be put on the windowsill. It should be borne in mind that during the day the temperature in the room should be kept in the range of + 23 ... + 25 ° C, and at night - not below + 15 ° C. The seedlings should be warmed up with bright diffused light for 12-14 hours. If there is a lack of light, you will have to use additional lamps.
- Watering... Seedlings need to be moistened as the topsoil dries. In this case, it is advisable to use a spray bottle and warm settled water.
- Top dressing... For active development, feeding should be started with seedlings. Seedlings can be sprayed with a solution of 1 g of ammonium nitrate and 1 g of superphosphate per 1 liter of clean water.
- Picking... With the appearance of 2-3 true leaves, the seedlings need to be dived if the seeds were planted in one common box, and not in separate cups. When diving, you should leave only strong and healthy shoots.
- Hardening... It is carried out 2-3 weeks before disembarking to a permanent place. The pots need to be taken out to the balcony or outside every day, first for 1 hour, and then for 1.5-2. At the same time, it is necessary to reduce the frequency of watering and provide the sprouts with an adequate supply of fresh air.
Once the seedlings get used to the slight coolness, they can be transplanted into an open area.
Transfer to soil
After 50-55 days after the appearance of the first shoots, the seedlings can be transplanted to their permanent place at the rate of 4 shoots per 1 sq. m plot. In this case, you need to adhere to the following scheme:
- 3 days before planting, cut off 3 lower leaves from the stems, leaving only small stumps to increase ventilation, protect against diseases and strengthen the fertile brush. After that, water the seedlings abundantly.
- During the day after transplanting, dig holes in the garden bed, the size of which is slightly larger than the size of the seedling container. Fall asleep in them for 1 tbsp. superphosphate, and then pour water to the brim. When it is completely absorbed, repeat the action 3 more times.
- During planting, take out the seedlings, transfer them to separate holes and cover them with the remaining soil, and then water them abundantly.

The second watering after planting should be carried out in a week, and before that, it is better to leave the seedlings alone.
Planting seeds in open ground
When growing tomatoes in temperate climates with a rather sultry summer, seeds should be planted in the ground in early May, when the soil warms up well and the likelihood of sudden frosts is minimized.
To get a good harvest, the soil should be prepared in the fall. It needs to be dug up with the addition of rotted manure or compost fertilizers. In the case of a greenhouse, it is advisable to replace 12 cm of the top soil layer. The new substrate must be fertilized with potassium salt and superphosphate at the rate of 40 g per 1 sq. m.
The landing pattern is as follows:
- Soak the seeds in a special growth stimulator for a day or until small sprouts appear. An alternative option is to wrap them in a damp soft cloth for a day.
- Prepare shallow seed furrows on the plot. Their optimum depth is about 3 cm.
- Sow seeds 5 cm apart. In the future, weak and excess shoots will be removed so that at least 40 cm remains between the grown and strengthened bushes.
- Cover the holes with seeds and water them abundantly.
- Cover the bed with a film, which is especially important for regions with a cool spring season.
To avoid the appearance of mold, the plantings should be regularly ventilated, especially in the case of areas with a slightly acidic or acidic soil reaction.
Maintenance and care
Growing seedlings need to be well cared for to get a good harvest. What agrotechnical methods need to be carried out, we will consider further.
Watering
The juggler tolerates short-term drought well, but the seedlings should still be watered abundantly in the morning or evening, using water that has been left in the sun for this. Meanwhile, the intensity of watering needs to be adjusted depending on the stage of development of the seedlings. The approximate watering scheme is as follows:
- After planting seeds or seedlings, water the soil abundantly.
- Carry out the second watering on the 7-10th day.
- During the flowering period, water the plant every 4 days at the rate of 3 liters of water per 1 bush.
- During the formation of inflorescences and ovaries, water the plant once a week at the rate of 4 liters of water per 1 bush.
- With the appearance of fruits, water the plant 2 times a week at the rate of 2 liters of water per 1 bush.
When watering a tomato, it should be borne in mind that excessive moisture is unacceptable, since it is a favorable environment for the spread of harmful fungi. However, it should also not be allowed to dry out, since this will lead to shedding of the ovaries, yellowing and twisting of the tops. So, you should adhere to moderation, taking into account the state of the upper soil layer.
Loosening, weeding
To ensure the full development of the bushes, the soil must be regularly loosened and cleaned of weeds. These two procedures are best combined and performed after watering the soil. In this case, you need to act very carefully so as not to damage the root system of the plant.
In the case of young plants planted with seeds directly into the ground, weak and excess shoots should also be removed along with the weeds.

Top dressing
The tomato is fed with organic matter and complex mineral fertilizers, which include such preparations:
- Sudarushka;
- Master;
- Kemira;
- AgroMaster;
- Plantafol.
The interval between their introduction should be at least 15-20 days, so about 5 dressings can be carried out in one season. Their approximate scheme is as follows:
- If the seedlings were not fed at home, 15 days after planting in a permanent place, the soil should be fertilized with a solution of mullein in a ratio of 1:10. Add 1 liter of this solution under each bush.
- For the next feeding, use superphosphate and potassium salt. Each substance is taken in 15 g and dissolved in water, which is poured into the root of the plants. Phosphorus will stimulate metabolic processes and strengthen the root system, and potassium will improve the taste of the fruit.
- During the next top dressing, instead of the usual mineral fertilizers, you can use wood ash, embedding it in the soil when loosening. There is another option - to dissolve the substance in water at the rate of 200 g per 10 liters of water, leave for 24 hours and pour under the root of the plants.
When feeding a tomato, an excess of nitrogen should not be allowed, as this will lead to excessive development of green mass and underdevelopment of fruits.
Stepson and garter
The plant needs partial pinching, although the seed package may indicate that the hybrid variety is not pinned. To obtain a bountiful harvest, it is necessary to form a bush of 3 stems and remove all stepsons that thicken the planting. The procedure should be carried out as needed, otherwise the sprouts will steal nutrients from the main shoots.
As for the garter, it should also not be neglected, although the variety is undersized. The bushes can be tied with a soft cloth tape to pegs driven into the ground, but it is better to install a trellis of several support bars and a wire stretched between them.
Protection against diseases and pests
Juggler F1 is a hybrid variety, therefore it is not afraid of many diseases that pose a threat to nightshade crops.However, prevention should not be neglected. Meanwhile, it involves a number of simple manipulations:
- pre-treat the site with copper sulfate and potassium permanganate;
- during the growth of tomatoes, regularly loosen the soil and remove weeds to ensure filtration and prevent the development of root rot;
- to prevent late blight, the plant should be treated with Ordan and Fitosporin, but the latter should be used 20 days before the expected harvest.
When growing tomatoes in open ground, you must also remember about the possibility of its defeat by various insects. Industrial insecticides can be used against them, with which the plantings need to be treated several times with an interval of 2-3 days. If the seedlings have attracted the attention of slugs, they can be scared away with ammonia.
It is necessary to use fungicides or insecticides strictly in accordance with the instructions on the package, so as not to burn the tops or simply not be left without a crop.
Harvesting and storage
With seedlings, the first crop can be harvested in mid-July, and seed crops - in late summer or early September. The collected fruits must be put into free boxes, immediately identifying and discarding rotting or cracked specimens.
You can keep a tomato in a dry basement at a temperature of + 6 ° C. Thus, they can be stored all autumn right up to winter.

Pros and cons
The juggler attracts gardeners with such advantages:
- high yield with minimal maintenance;
- good transportability and high keeping quality;
- excellent taste;
- resistance to many diseases and insects;
- versatility in application;
- the possibility of growing in regions with a cool climate;
- the ability to tolerate sudden changes in temperature.
The disadvantages of the hybrid have not been identified, however, mistakes in growing and caring for the plant can lead to a decrease in both the yield and the taste of the fruit.
Tomato Juggler is an early ripe variety that can withstand sudden temperature changes and changes in weather conditions. Produces a good harvest when grown in an area that is well lit by the sun. Tomatoes have a universal purpose, so they can be eaten fresh or used for canning, processing into tomato products.